When people from the dotNet world hear about actifsource running on eclipse, they always ask us if it is possible to generate c# code for example. Today I want to show you how to create a c# application in eclipse using the emonic plugin.
First you have to install some prerequisites:
- nant - which is used to build the c# projects
- mono or Microsoft .NET Framwork - providing the tools and resources to run and build c#-projects
After you have installed them you need to setup emonic:
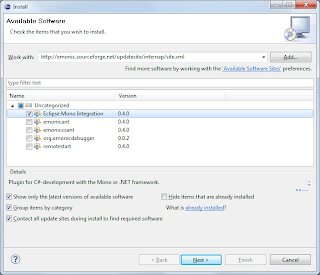
I only installed the "Eclipse Mono Integration", the debugger doesn't want to install at the moment and the other features are not required for this demo. When you have finished the installation, you first need to setup .NET preferences. Select the nant-binary-file:

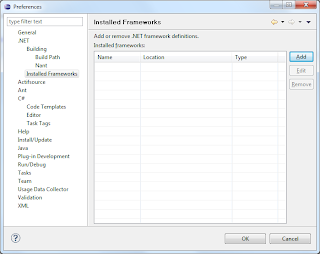
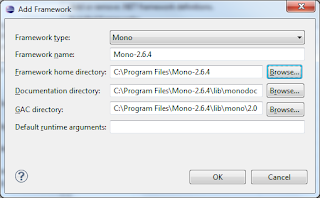
and afterwards add a .NET-Framework Implementation. For example I used mono and chose the following settings:
Now create an actifsource projects for your meta model and the actifsource templates. I used the actifsource core model as meta model and wrote a simple data class template. The template is nothing special, but instead of writing java code, I wrote c# code:


Note that I have created a separate actifsource project for the actifsource template and generation specific resources. With our multi model concept, there is no need to modify your meta model project, just create an extension project. Since the actifsource project containing the template is a Java Project and mixing Java Code with C# Code is not recommended, switch to .NET-Perspective and create a separate .NET-Project.


I used "Mono 2.0" as target, you may use another target framework. This setting is important, since generics for example are not available in "Mono 1.0".
For generating the data classes I first need some actifsource classes. I just reused one of my last examples and put it into a newly created asrc folder in the dotNet project.

Now there are only a few steps to do, add a project dependency to the template-project and define the target folder.

The c# files will be generated immediately after pressing "ok". In emonic to make them compile, you have to right click on them and add each file to the build.

When doing this the first time, you need to set a build target:

Finally I added a small demo application which creates two instances of the class "Person", fills them and queries the data for writing it to the console.

To run the application one needs to right-click on the exe-file and select run .NET-Application.

That's it. If you don't want to add each file, you need to edit the build script and make use of wildcards. One drawback using wildcards is that the emonic builder doesn't seem to detect file changes for these resources.


No comments:
Post a Comment